

I’ll never forget the Saturday morning when my grandmother first taught me to make this quick bread. With flour dusting her apron and patience in her voice, she showed me how bread doesn’t always need hours of rising or complicated techniques. This recipe became my culinary lifeline during my college years when time was scarce but comfort was necessary.
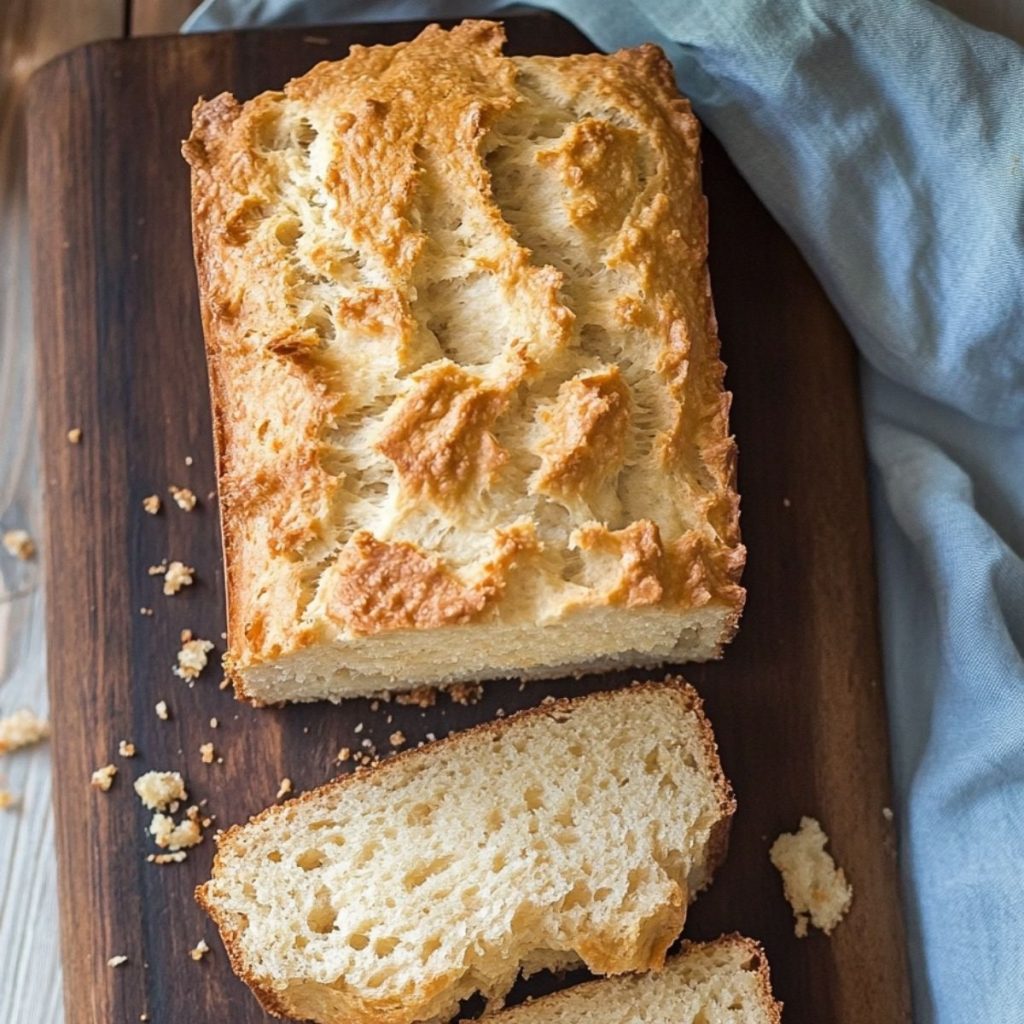
The magic of this bread lies in its perfect balance of simplicity and satisfaction. The all-purpose flour creates a tender crumb while the subtle sweetness from the sugar pairs beautifully with the richness of milk. When that warm, fragrant loaf emerges from the oven, the aroma alone is enough to transform any kitchen into a sanctuary of comfort.
I encourage you to try this recipe whenever you need a little baking therapy without the time commitment. Whether you’re a novice baker or simply pressed for time, this forgiving recipe welcomes all skill levels. The reward of slicing into warm, homemade bread just 20 minutes after starting is truly one of life’s simple but profound pleasures.
Why You’ll Love This Recipe
- Incredibly Time-Efficient: I’ve designed this bread to be ready in just 20 minutes from start to finish – perfect for those moments when you crave homemade bread but don’t have hours to wait.
- No Yeast Required: I love that this recipe skips the yeast entirely, eliminating the anxiety of proofing and rising times that can intimidate even experienced bakers.
- Versatile Base: I’ve found this bread works beautifully as a canvas for both sweet and savory variations, from cinnamon-sugar to herb and cheese.
- Satisfying Texture: The crumb has a delightful density that I find perfect for sopping up soups or holding spreads without falling apart.
- Foolproof Success: Having made this countless times, I can assure you the straightforward methodology delivers consistent results even if you’re new to baking.
- Minimal Equipment: I appreciate that this recipe requires just a bowl and spoon – no stand mixer or bread machine necessary.
- Warm Comfort: The comforting taste is like a warm hug that’s both rewarding and refreshing, especially on those days when only homemade will do.
Ingredients for This Recipe
- All-Purpose Flour: The backbone of our bread that provides structure. I select unbleached for its slightly better flavor, but bleached works perfectly well too.
- Sugar: I use this not just for sweetness, but also to help achieve that beautiful golden crust. It feeds the baking powder reaction for better rise.
- Baking Powder: The miracle worker that gives our bread lift without yeast. I always check the expiration date – fresh baking powder is crucial for proper rise.
- Salt: The flavor enhancer that transforms bland dough into bread with personality. I prefer kosher salt for its clean taste and easy measuring.
- Milk: Adds richness and creates a tender crumb structure. I use whole milk for the best flavor, but 2% works well if that’s what you have on hand.
- Vegetable Oil: Keeps our bread moist and tender. I’ve found it creates a better texture than butter in this quick-bread formula.
- Butter (for brushing): The finishing touch that gives our crust that irresistible golden glow and rich flavor. I always use salted butter here for extra flavor.
How to Make This Recipe
1. Prepare Your Oven and Pan: Preheat your oven to 425°F. I like to do this first so the oven reaches perfect temperature by the time our dough is ready. Lightly grease an 8×4 inch loaf pan.
2. Mix Dry Ingredients: In a large bowl, combine flour, sugar, baking powder, and salt. I whisk these together thoroughly to ensure even distribution of the leavening agents.
3. Add Wet Ingredients: Pour in the milk and vegetable oil. The mixture will look somewhat craggy at first, but don’t worry! Stir just until combined, being careful not to overmix.
4. Handle the Dough: The dough will be sticky – that’s perfect! Transfer it to your prepared loaf pan and gently smooth the top with slightly damp fingers. The texture should be somewhere between a thick batter and a soft dough.
5. Bake to Perfection: Slide your pan into the preheated oven and bake for 15-18 minutes. The bread is ready when the top turns a beautiful golden brown and a toothpick inserted in the center comes out clean.
6. Apply the Finishing Touch: Brush the top with melted butter while still hot from the oven. This not only adds wonderful flavor but also creates that delightfully soft crust we all love.
7. Cool Slightly: Allow the bread to rest in the pan for 5 minutes before turning out onto a cooling rack. I find this brief rest helps the structure set properly.
8. Serve and Enjoy: For the ultimate experience, slice while still warm. The steam that escapes carries the most heavenly aroma – a reward for your minimal effort!
Expert Cooking Tips
- Check Your Baking Powder: I always test mine by putting a teaspoon in hot water – if it bubbles vigorously, it’s fresh and active for maximum rise.
- Don’t Overmix: I stop stirring as soon as the ingredients come together. Overmixing develops gluten that can make your bread tough rather than tender.
- Measure Flour Correctly: I fluff the flour, spoon it into my measuring cup, and level with a knife. Scooping directly compacts flour, giving you too much.
- Adjust For Altitude: Living at higher elevation? I add an extra tablespoon of flour and reduce baking powder by ¼ teaspoon for perfect results above 3,500 feet.
- Create Steam: For extra moistness, I sometimes place a small oven-safe dish of water on the bottom rack while baking. The steam works wonders for texture!
Proper Storage
- Room Temperature: Wrap completely cooled bread in plastic wrap or store in an airtight container for up to 2 days. I find this preserves the texture best for short-term storage.
- Refrigeration: Not recommended! I’ve learned the hard way that refrigeration actually accelerates staleness in this type of bread.
- Freezing: Slice before freezing, separating pieces with parchment. Freeze in an airtight container up to 3 months. The individual slices thaw in minutes when needed.
- Refreshing: To revive day-old bread, I sprinkle with water and warm in a 300°F oven for 5-10 minutes. The transformation is remarkable!
Variations and Substitutions
- Dairy-Free Version: Swap milk with unsweetened almond or oat milk for a dairy-free loaf that maintains moisture. Use olive oil for brushing instead of butter.
- Herb & Garlic: I love adding 1 teaspoon of dried Italian herbs and ½ teaspoon of garlic powder to the dry ingredients for a savory version that pairs perfectly with dinner.
- Whole Wheat Blend: For added nutrition, substitute up to 1 cup of the all-purpose flour with whole wheat. I add an extra tablespoon of milk to maintain moisture.
- Sweet Cinnamon Sugar: Mix 2 tablespoons of sugar with 1 teaspoon of cinnamon and sprinkle over the top before baking for a breakfast-worthy treat.
- Cheese Lovers: Fold in ¾ cup of shredded cheddar or parmesan before baking. I find this creates pockets of melty goodness throughout the bread.
What Goes with This Recipe
- Hearty Soups: A steaming bowl of tomato or vegetable soup pairs wonderfully with this bread, creating a complete meal that warms from the inside out.
- Compound Butter: I whip softened butter with herbs or honey for a spreadable topping that elevates the bread’s simple character to something special.
- Breakfast Ensemble: Serve alongside scrambled eggs and fresh fruit for a weekend breakfast that feels both special and comforting.
- Charcuterie Components: This bread makes an excellent base for meats and cheeses. Its neutral flavor profile supports rather than competes with bold toppings.
- Simple Jam: The slight sweetness of the bread pairs beautifully with any homemade or quality store-bought jam, creating a delightful afternoon snack.
FAQ
Can I substitute buttermilk for regular milk? Yes! I’ve found it adds a pleasant tanginess, but reduce the baking powder to 2 teaspoons and add ¼ teaspoon baking soda.
Why didn’t my bread rise properly? Check your baking powder’s freshness and ensure your oven was fully preheated. Both factors significantly impact rise.
Can I make muffins instead of a loaf? Absolutely! I bake them at the same temperature for about 12 minutes. The recipe yields approximately 8 muffins.
Is this bread freezer-friendly? Definitely! I slice it first, then freeze in an airtight container. Individual slices thaw quickly when needed.
How can I make it more flavorful? Try adding herbs, cheese, or garlic to the dough. I find these simple additions transform the basic recipe beautifully.
Print
20-Minute Homemade Bread
- Total Time: 20 minutes
- Yield: 8x4 inch loaf (8 servings) 1x
Description
Discover my foolproof 20-Minute Homemade Bread recipe that requires no yeast or rising time. This quick, tender loaf delivers warm, fresh-baked comfort with minimal effort – perfect for busy days when only homemade will do.
Ingredients
- 2 cups all-purpose flour
- 1 tablespoon sugar
- 1 tablespoon baking powder
- 1 teaspoon salt
- 1 cup milk
- 1/4 cup vegetable oil
- 1 tablespoon butter, melted (for brushing)
Instructions
- Preheat oven to 425°F. Grease an 8×4 inch loaf pan.
- In a large bowl, whisk together flour, sugar, baking powder, and salt.
- Add milk and oil, stirring just until combined. Don’t overmix.
- Transfer sticky dough to prepared pan, smoothing top gently.
- Bake 15-18 minutes until golden and a toothpick comes out clean.
- Brush hot bread with melted butter.
- Rest 5 minutes in pan, then turn out onto cooling rack.
- Serve warm for best experience.
- Prep Time: 5 minutes
- Cook Time: 15 minutes


Leave a Comment